
"First to fight" is a new Polish brand offering scale models connected with the Polish September Campaign of 1939. All models are prepared in 1/72 scale as models for war gamers. However, these simply models are good quality products and could be a fine base to build a realistic replicas.


I decided to build a model of vehicle that served in german expeditionary corps during war in Africa. For a little diorama I chose two figures from Revell and old Esci sets. Assembly the elements don't cause any problems. To make more attractive this small model I added some details like tools on fenders, infantry equipment, bucket, antena, and opened hatch.


I started paint job with german dark grey from Tamiya.

For highlights I mixed the same dark grey with brighter one.

Preparing model for decals I covered it with gloss coat for a smooth surface. Puting decals I used Microscale SOL & SET. When they got dry, to protect them, I put another layer of Tamiya gloss coat. Before base african color, I covered model with hair spray to achieve scratches in next steps.


For dunkelgelb camouflage I used different shades of Lifecolor acrylic paints. Brighter colors were applied as highlights, the last one with brush only at details like botls, hinges, headlamps.


Starting with scratches, I dampened model with water. For bigger losses of paint I used brush. Small scratches were made with needle.
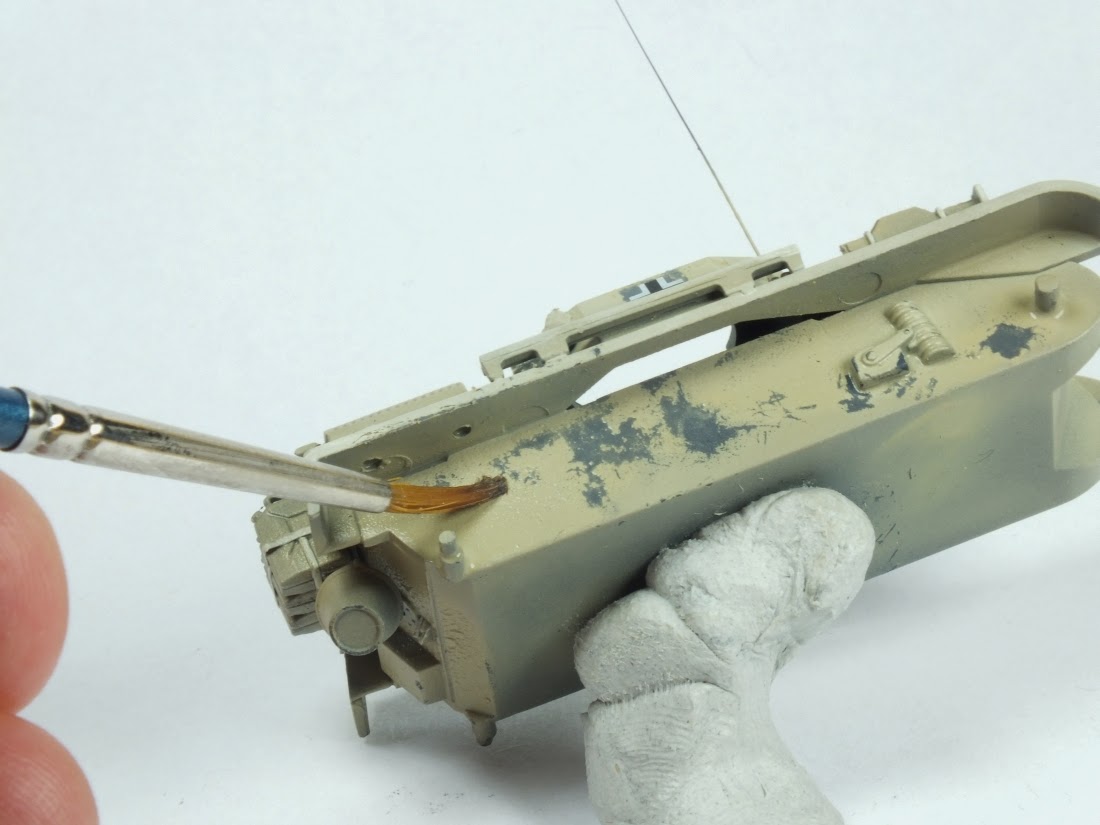


At this stage paint is delicate, adheres to model weakly. It's important to protect results applying a layer of coat.

For rusty covers of exhausts I used Lifecolor acrylic paints set. At the end to simulate remains of camouflage paint I put some chips of base color.


I also painted other details with various Lifecolor paints.


I started weathering with washing the whole model. I used mixture made of White Spirit and Raw Umber oil paint.

As next step I made pin wash. Meaning the blackening concave lines of elements. I prepared for this a mixture of Bruno Van Dycke brown and Ivory Black oil paints dilute with a Humbrol thiner for enamels. It's important to apply it only inside the lines and around elements like bolts to express them.


For dust and mud I prepared materials like terracotta glue, various oil paints, dry pastels and Pigment Fixer from MiG.

With oil paints I made a typical fadding at the lower parts of model. If result is not satisfactory, fading could be repeating with other colors. It's easy to regulate it with brush moistened in White Spirit.


As mud I used a mix of grated dry pastels and terracotta glue. For apply it at model I used brush, it's easy to regulate shape of mud heaps with wet brush.


For dusting, first, I apply Pigment Fixer with airbrush (working on really low pressure). At the wet surface were imposed by brush dry pastels. Due to fast drying of Fixer, it's easier to conduct dusting in individual parts of tank.


And here is tank ready to mount at base


As material for base I used mounting foam. I filled with it a form made of furled plastic stripe.

For rest of work I used prepared earlier foam block, terracotta glue, bathing sand for chinchilla, small rocks and electrostatic grass for railway modellers.

As first I applied terracotta glue and formed with it marks of tracks and wheels. To various textures I sprinkled fresh glue with some sand. And added also few rocks and grass clumps.

Base was painted with various earth and sand colours. After mounting tank and figures I added some bright pastel.

For figures I used Lifecolor paints and wash made of Van Dycke bron oil pant for finish. Tank crewman was converted from infantry figure. I removed MP-40 and added headphones.


Awesome work, sir! By the way, which colors (fab. numbers) did U use for dunkelgelb? :)
ReplyDeleteThank you. Unfortunately I'm not able to answer about numbers. They wear down really quick from Lifecolor bottles.
Delete